How to Make a Lobstering Bully Net
Finding a good bullynet can sometimes be more difficult then finding
the actual lobster. Some seasons you can walk into World Wide
Sportsman in Islamorada, or Divers Direct in Key Largo and find
one, and other seasons you can't. Rather then leaving your bully
netting up to chance, you can attempt to make one yourself. Our
first attempt at making one for ourselves left us with mixed results.
Below we will discuss some of the positive and negative attributes
to making your own bully net as we did.
First off, it's a whole lot cheaper to just go and buy a bully net,
so if you are would rather save a few bucks, just go and buy one.
We found a few at World Wide Sportsman in Islamorada this year for
$19.99. The problem is, will they have them when you get there?
Another negative about trying to purchase a ready made one is that
the poles are about 6ft long. The ones we made are extendable
from 6-12ft long. If you are 6 ft tall and the deck of your boat
is 1-3ft above water, you don't have a lot of pole left when you
are hunting in 3 ft of water. Having the ability to change the
length of your pole can be a great asset.
|
| |
The first step is to figure out how big you want your hoop to be.
This is somewhat limited to the size of the net you are able to
find. We used a replacement net we purchased from Gander Mountain
which is a local outdoor store. Wanting to make a big hoop, we
purchased a rather large net. This turned out to be a mistake as
the holes in the net itself were rather large. When we tested it,
we had a few lobsters actually slip through the net, however I'm
pretty sure they were too small anyway. Make sure the net you pick
is plenty deep as this is very critical when trying to bring a lobster
up from deeper water.
|
| |
|
| |
|
| |
| |
| |
Once you have purchased your net, you will have to figure out
the length of tubing or pipe you will need. A safe length is
8ft as even the largest net we made worked with this length.
To figure out the actual length you will need you will need to
do a little math. I'm sure you all remember how to figure out
the circumference of a circle. If the net you purchased was
for a 24in wide hoop, all you have to do is 2ft or 24in x 3.14.
This equals about 6.25 ft or 75 in. You will also need 12-24in
of additional length to attach your pole to. Believe it or not,
a 24 inch net is huge. The bully net you would buy at the store
is about 19 in wide. I recommend making your net about 21 inches
in diameter, however this is a little too big for a 6 ft pole. I
believe the reason the ones you can buy are 19in is because that
is what a standard 6 ft pole works out to make. The reason I
would go with 21in is because the extra width gives you a better
chance of catching the lobster without becoming to cumbersome.
|
| |
|
| |
| |
The next step is to find a supplier of 1/2in - 3/4in aluminum tubing or some 1/4in steel rods.
The rods can be picked up from Home depot for around $6, however they only sell it in 6 ft lengths. The aluminum tubing requires
a little more effort to find but comes in lengths of up to 24 ft. I went with 8ft long 3/4 in Aluminum tubing which cost about $15.
Looking back, it would have made more sense to go with either 1/2in tubing or 3/4in rods. The 3/4 in was a bit of over kill and if anything,
made it more difficult to penetrate the water, although not significantly more difficult. The bully nets we purchased which have steel
rods seem to penetrate the water the easiest.
|
| |
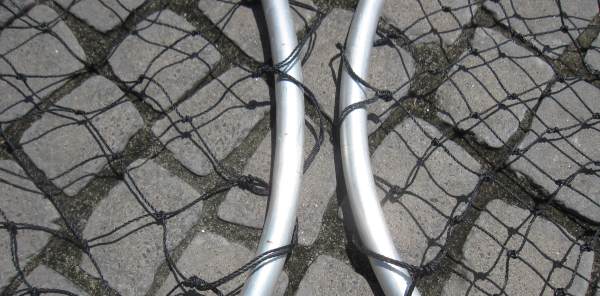
We used a 3/4in conduit/pipe bender that I picked up at home depot to bend the pipe into the shape of a net. I've seen
some people make jigs out of wood to bend the pipe around, but we did not try this technique. If we were going to make
a bunch of them all in the same size, a jig would probably be the way to go. We marked the pipe in 1 ft increments so
that we could try to keep the bends even. On the first attempt we left about 12 in unbent on each end so that we would
have a way to attach to the extension pole. We started to bend the pipe on one end about 12 inch from the end. We slowly
worked our way around the pole moving about 3in at a time, slightly bending the pole each time. We did this several times
watching our marks and trying to keep the circle as even as we could. We did this until we had a semi circle. Before
completing the circle, We bent each of the 12in sections at a 90 degree angle to form a point to attach the extension pole.
The 90 degree bends were done in such a way as to have them bump up against each other once we finished the circle. If
you are working with an 8ft pole but are trying to make a smaller 21in hoop, I would recommend leaving the extra length
and not cutting the poles until you have finished bending everything.
|
| |
|
| |
| |
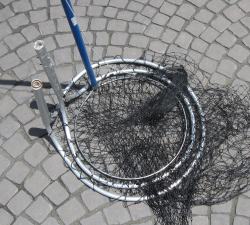
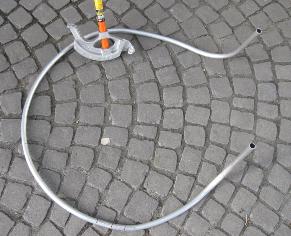
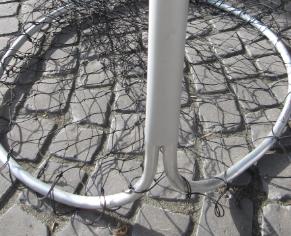
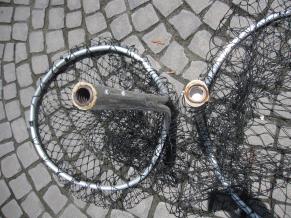
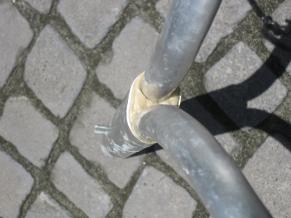
Now that the circle was complete we attached the net to the newly
formed hoop. Once the net was in place and we made sure it looked
good, it was time to attach a piece of larger diameter pipe we would
use to attach the extension to. We chose a piece of scrap pipe
about 12 in long with a diameter just shy of being able to fit both
pipes side by side. We then took a rubber mallet and hammered the
pipe at one end so that it was more of an oval shape. This allowed
both ends of the hoop to snugly fit into it.
|
| |
|
| |
| |
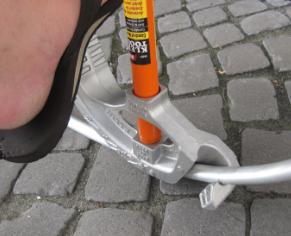
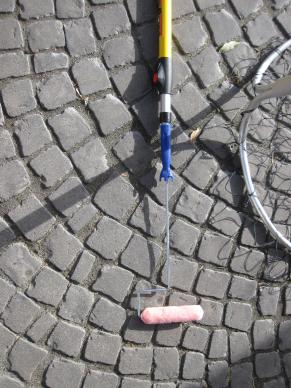
For a handle, we chose an extendable paint pole from Home Depot which cost anywhere from $20-$40 depending on the model you get.
Having chosen an extendable paint pole as our handle we tried to figure out a good way of attaching it to the net.
We decided that if we bought some paint rollers we could cut off the handle and slide it into the pipe connected to the hoop
and create a removable handle. Unfortunately the handles we purchased didn't hold up well in the long run. We used both a
wooden handle paint roller that had a metal insert for the threads, and a plastic handle paint roller. By the end of the trip,
both handles failed. The metal insert came out of the wooden handle, and the plastic handle became stripped. It appears that
we may need to use some sort of stronger homemade custom threaded end or just attach the net
directly to the extendable paint pole.
|
| |
|
| |
| |
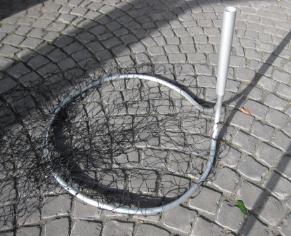
We cut off the roller and inserted the handle into the end of the pipe
connected to the hoop so that it was flush. Looking back, we would
have been better off inserting the roller handle deeper into the end
of the pole. This would have given the connection a little more
strength as some of the stress would have been exerted on the walls
of the pole instead of the screw joint of the paint handle. We then
drilled some holes through the pipe and handle and inserted some small
#8 stainless bolts. We then used a caulk gun and some concrete caulk
which was recommended by an employee of Home Depot. Within a few
hours the caulk had dried and become hard.
|
| |
|
| |
|
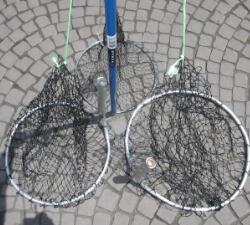
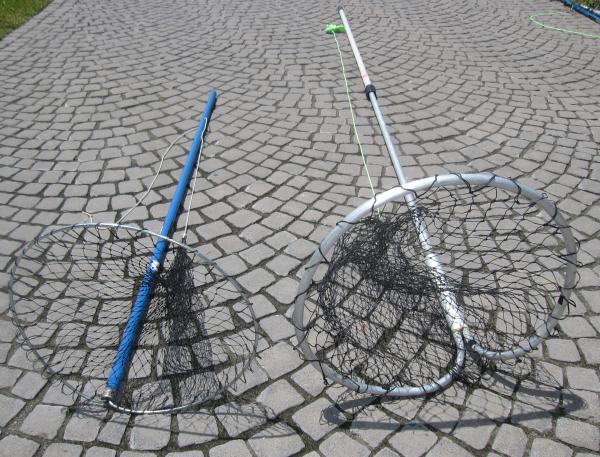
After screwing the paint pole into the newly finished hoop
the final step was to attach a piece of string to the end
of the net. This string is used to keep the net up when you
are plunging it into the water. Without the string, you run
the risk of having the net fall below the hoop and getting
tangled as you plunge it into the water. A good idea is to
attach the string mid way up the pole with a piece of duck
tape. With an extendable pole, you don't want a permanent
spot for the string because depending on the length you use,
you may have to move it up or down and adjust the length of
the string. Happy Bully Netting!!
|
| |
|
|
|